 |
Keep Calm and Grog On! |
|
| Home | About Us | Article Index | Forums | Dice | GrogShop | GH ON FACEBOOK | GrogNews |
Let Your Grog Flag Fly!Recent ArticlesGARPA 17, 4/26/13 SimCity AAR Part 1, 4/25/13 Announcing MayViation, 4/24/13 Second Look at Wargame AirLand Battle, 4/21/13 First Look at Wargame AirLand Battle 4/19/13 AAR of Dark Age Minis Battle, 4/18/13 Video Review of Zulus on the Ramparts, 4/14/13 GARPA 16, 4/12/13 Crusader Kings II AAR Part 16, 4/11/13 Book Review: Ninja: 1000 Years of the Shadow Warrior, 4/10/13 Review of Bioshock INfinite, 4/7/13 Review of XFX PRO650W Core Edition PSU, 4/5/13 Civilization V AAR, Part 13, 4/4/13 Fire with Fire, 3/31/13 GARPA 15, 3/29/13 Civilization V AAR, Part 12, 3/28/13 Wheaton INterview, 3/27/13 March Mayhem Winner, 3/25/13 Warlock Multiplayer AAR, 3/21/13 WWII PTO Alternate Histories, 3/20/13 GARPA 14, 3/15/13 Crusader Kings II AAR, part 15, 3/14/13 Civilization V AAR, part 11, 3/7/13 Prezcon Convention Coverage, 3/2/13 Civilization V AAR, part 10, 3/3/13 |
Flames of War AARBy Jim Zabek, 18 March, 2012The visceral appeal of minis is obvious when you have a 3D view of war. But how does it play? J-Z fills us in...IntroductionsI am a relative newcomer to minis gaming, my interest starting in the last decade. The more minis games I play the fonder I become of them, and that has offset any boardgaming I do these days. I still love boardgames, but in my circles minis gamers are more common. Of all the historical wargames out there Flames of War is probably the most popular. Almost any town with a game store will have at least a few folks playing this World War II game. The reason for its popularity becomes apparent the first time you play the game – it is fast and has reasonable historical accuracy.
Players do not need to get bogged down in tons of rules. Though the rulebook is sizable, the core rules to play with are easy enough that vets can walk a newcomer through on the fly. The result is that players can move a squad-level, company-sized force across the board in three hours and have fun doing it. Flames of War is effectively the Steel Panthers of the minis world. There are other games out there with arguably “more realistic” rules, but the simple fact is Flames of War is “good enough” that it has become possible for gamers to find a game typically in the same town, if not at the next larger town not too far away. Suffice it to say that a group of guys in my hometown are playing the game and I have been drawn into their orbit. A few days ago I had the pleasure of gaming with one of the guys in our group. He’s been playing for years, and can easily field of battalion of both German and Soviet troops. I, as a newcomer, have just managed to collect enough late war minis to cobble together a force that can weigh in at about 2000 points, which can be shaved down to the tournament standard of 1750. As with any minis game, having the bare minimum of minis is acceptable, but generally speaking players seek a greater variety in order to both field larger forces as well as to not be forced to rely on the same predictable force each time. Inevitably, I expect the size of my force to continue to grow. A word about the minis themselves: because Flames of War is set during World War II, it’s impossible to corner the market on sculpts. When Games Workshop makes a Space Marine, it’s patented and they can demand all players use their minis or take a hike. Not so with Flames of War. A Sherman is a Sherman and so long as players show up at a game with minis that are 1:100 scale (aka 15 mm) they’re good to go. Where Battlefront (the game’s New Zealand creator, not to be confused with Battlefront.com, the electronic game publisher) distinguishes its minis through detail. Their sculpts offer much more detail than lower-priced minis. While I’ve been tempted to buy substitutes, so far my minis are all from the Battlefront, and I like what I have.
The RulesRules for Flames of War have recently been updated. Unlike some minis publishers who entirely rewrite their rules in a new release, Flames of War typically issues what can be considered to be updates. The base rules rarely change. While I wasn’t intimately familiar with the old rules, the new ones have a lot of fans cheering: air power is more significant, transport vehicles that are destroyed no longer count against the player, and vehicles retreated off the map may return, instead of being lost forever. Those are probably the most significant changes to the game.
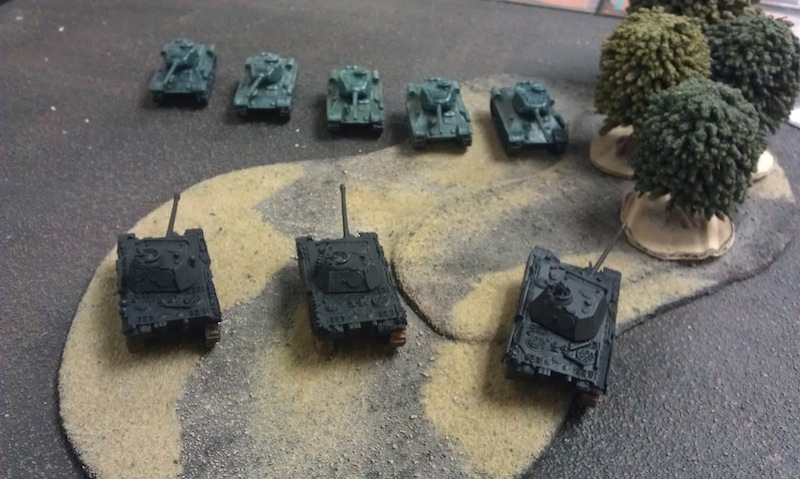
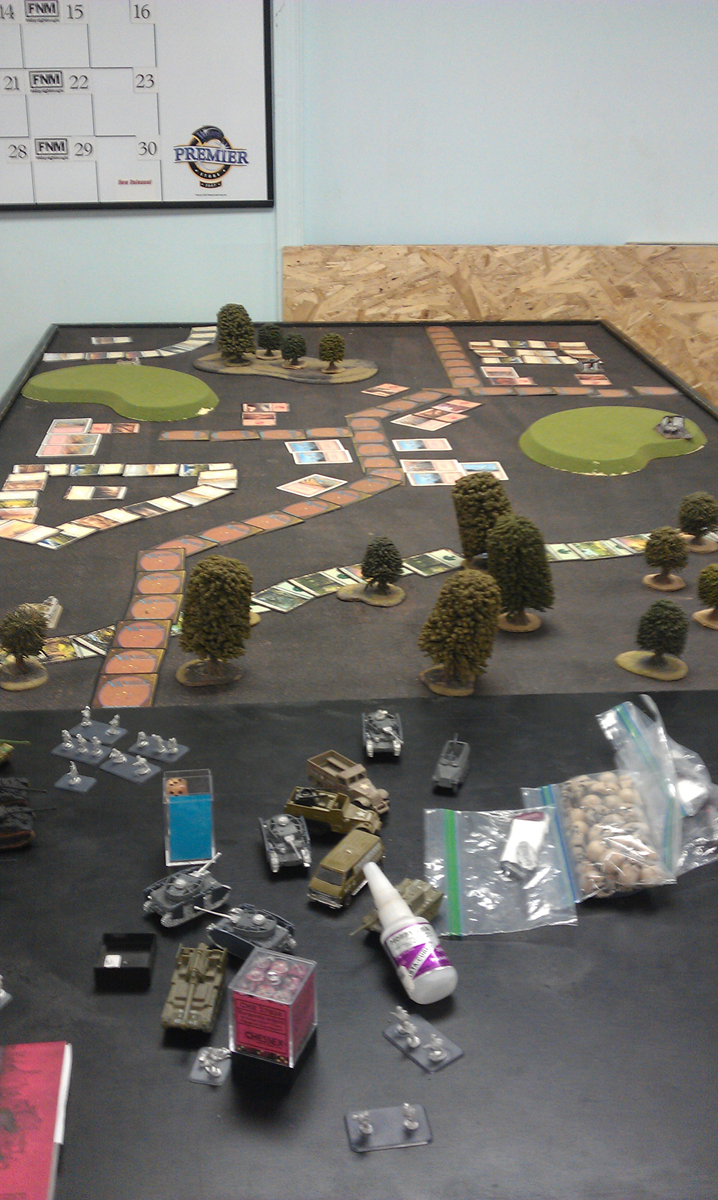
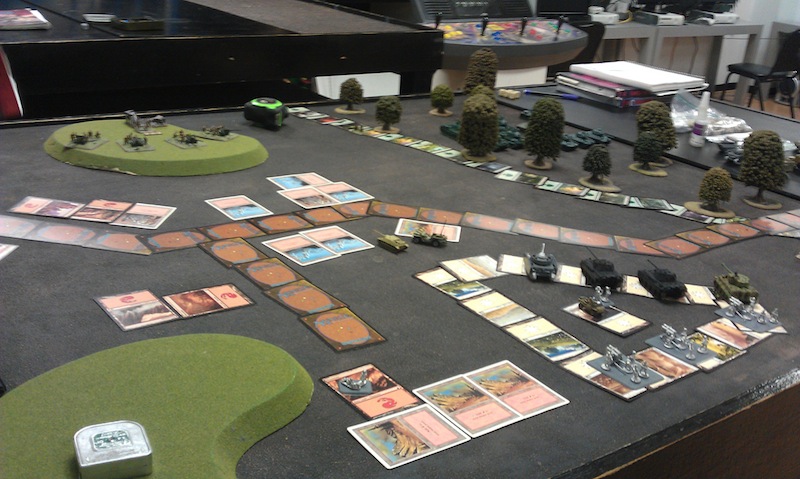
The Eastern FrontFor our game we chose a late war engagement on the Eastern Front. A quick glance of the images will reveal a jarring disconnect on my part. While all my forces are at least German, only the infantry’s minis are correct. My opponent, Trevor, is a nice guy and is able to field almost any imaginable force. He agreed to allow me to substitute virtually every vehicle I had in order to experience a game where I had a heavy panzer company at 2000 points. As a result if you see a Panther or a Pz IV, imagine it’s a Tiger. Those Nebelwerfers are not stationary, they’re supposed to be on trucks. The American Jeep? (from my childhood Hot Wheels collection) That’s a Wirbelwind anti-aircraft gun. Further stretching the reader’s imagination is the fact that Magic cards were used to define most of the map. Our local game store’s best customers are Magic: The Gathering fans. As a result there are hundreds of common land cards available to borrow for pretty much any purpose. White lands represent agricultural fields that provide visual cover. Red lands represented buildings. The brown reverse sides were roads. Green lands represented the edges of forests. The map itself was a bit cluttered with buildings, but that was OK. It made it a natural break in the terrain forcing the action on to the flanks. My Soviet opponent fielded two platoons consisting of five T-34s, and one platoon of five IS-2s. He had six mortar tubes, and four Zis-2 anti-tank guns, his command squad was a T-34. All of Trevor’s T-34’s were T-34/85s. My force consisted of one command Tiger, two platoons of three Tigers each, two Wirbelwind mobile anti-aircraft armored vehicles, two squads of mechanized Panzergrenadiers, and three mobile Panzerwerfer 42s. The exact total of my force worked out to 1960 points and my opponent’s was about the same. We were well matched. Deploying ForcesAs noted above, the map was set up so the action was on the flanks. Although the game requires we take turns setting up units, ours turned out to be remarkably symmetrical. Armor to the flanks, artillery to the middle – with supplemental Soviet mortars on his right. My infantry was on my left. Two objectives were held by the opposite team.
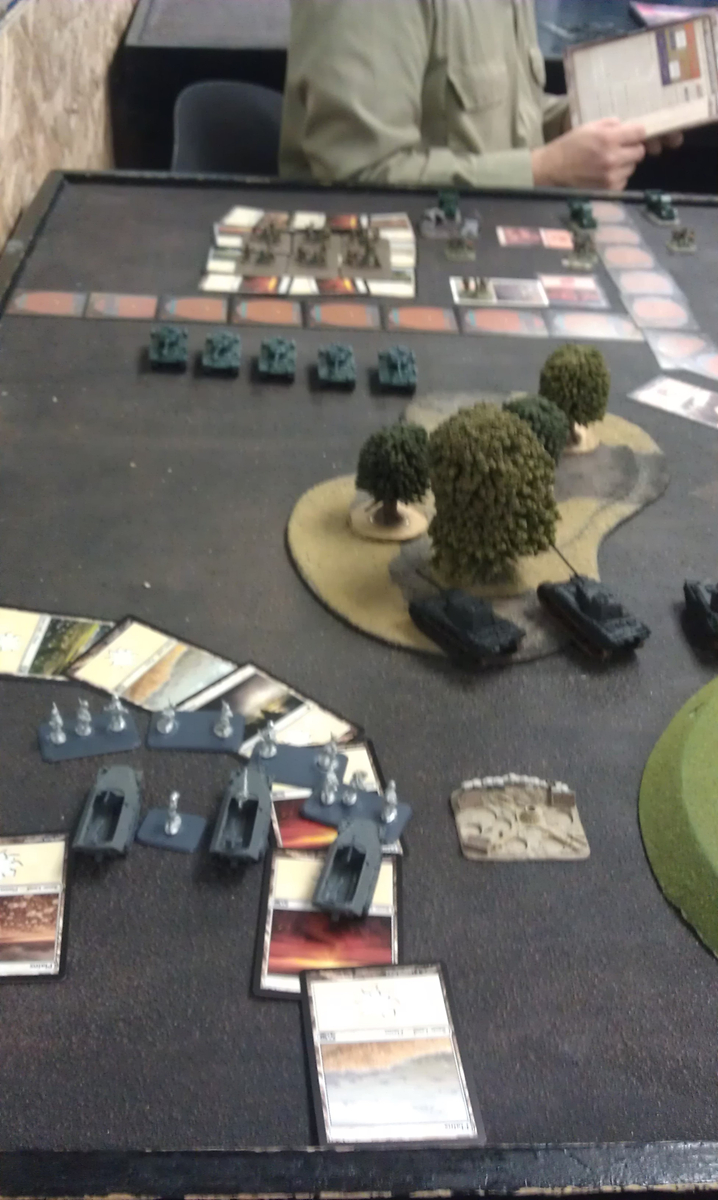
Turn one started with the Soviets on the move. On my left a squad of T-34s approached a small wooded area and threatened the infantry hiding in the field. On the right the HQ squad, T-34s and IS-2s made their way through the forest. Throughout the game a few tanks would bog down there, many to be dug out only to bog down again. Most made it through but the images will show a trail of vehicles left behind as the bulk of the force pushed toward my lines. Action on the right flank would not take place for several turns. Most of the action would be unfolding on the left. During my turn I moved my small squad of three Tigers into the woods. Their flanks were protected from the Zis-2 anti-tank guns by buildings. As a result two of my three tanks made it into the woods in the first turn. The second turn forced my Russian opponent into something of a dilemma: should he pursue my tanks in the woods or attempt to outflank them and risk getting caught by my infantry? He gambled on moving into the woods. Two T-34s bogged down as they entered the woods. One of my Tigers forced the crew from a T-34 to bail, so for the next turn it was two Tigers against two T-34s. His salvo has no effect.
By the third turn, as I noted above, the Soviet push into the forest on my right saw three tanks bogged down in rough terrain. The battle evolving in the middle sees a failure of my rocket artillery to range-in on the Soviet AT guns. Trevor purchased no air power for this game, so my anti-aircraft units will have to fulfill a secondary role as mobile heavy machineguns. Rolling up to one of the Soviet guns they unload, but to no effect. The battle in the middle has been a stalemate for two turns, but on the third a Soviet gun crew finally manages to tag one of my Wirbelwinds with a solid hit and blows it to bits. Those units have some armor, but they are not tanks, and the Zis-2 is a designed to punch a hole through the finest German armor. If they hit, I stand no chance. The next turn I decide to move my infantry on the offensive. They have no Panzerfausts, but they can still assault. Their three SdKfz 251 halftracks lurch forward, too. The section HQ halftrack has a light 37mm anti-tank gun on it. It has only the slimmest chance of taking out a T-34, and only then from the flank or rear. But I hope that between my Tigers, infantry, and transport maybe I can do some damage. It is not to be. My dice have been ice cold the entire game. Swapping out one set for another does no good. My attacks on the left come to naught. In the center my rocket artillery blasts away to no effect. My Wirbelwind in the middle bounces a few rounds harmlessly over the heads of the Soviet AT crew. On the right I move my three Tigers and my Command Tiger to protect the objective on the right. If the Soviet player gets within four inches of it and I don’t contest it, he wins the game. In our scramble to the right, two tanks get bogged down. This doesn’t bother me: they’re not exactly in cover but the Soviet player is still somewhat distant. Even so, the objective is well protected, even if the tanks are just in the open. The following turn the Soviet tanks arrive on the right. Fire from one of my Tigers forces the crew out of a T-34.
On my left my luck has run out. The Soviet player manages to free his T-34s and five of them arrive to pound my Tigers. I lose two of my three. The next turn sees me take out the Soviet tanks on the right – I kill two T-34s and one IS-2 and force yet another IS-2 crew to bail out. But then my luck runs out again, and I lose three Tigers. With one remaining on the right and one on the left, there is little to stop the Soviets from taking both objectives within the next turn or two, and I concede the game. Lessons LearnedIn most games I play I can usually identify points where I could have played better, but that isn’t the case here. I felt my forces were well-balanced. It might have been nice to have had four Tigers in a platoon rather than three, but that would have been at the expense of infantry and artillery – something I feel is necessary to have a well-rounded force – even in this case, going up against a Soviet force that lacked infantry. In this instance maybe having yet another Tiger in each platoon might have helped, but in truth, it was my own luck that killed me. Fortune is a fact of life and war – and I prefer to play wargames where fortune plays a role. If my dice had rolled even average results it is likely that the result of the game might have been dramatically different. Keep in mind – I’m not complaining. I’ve been on the winning end of some hot dice rolls, and there is no better feeling than having the confidence that you can push your luck and your dice won’t fail you. With the good comes the bad, and I had fun regardless. But what I can’t fault here is either the force selection or the gameplay. In chatting about the game afterward, Trevor felt the hand of luck at the dice, too, and inwardly shuddered each time I rolled – afraid my luck would change for the better. At almost any point up to the last turn, had more of my shots landed or done damage, we both agreed that outcome of the game could have shifted dramatically. Conversely, Trevor played equally well. He had a solid force. He took advantage of the terrain. While he had some bad luck with regard to bogging down in the woods, his dice rolls on the attack were about average. His tactics were sound. I was not sure that taking four turns to weave through the forest would be a good idea, but despite a few bogged down tanks, it allowed him to bring most of his force on target intact with an excellent chance of destroying my defending Tigers. Had any of my artillery actually landed on the Soviet AT guns it could have been a game changer. If we’d destroyed a few weapons it would have been a big win. Taking out units in Flames of War can also win the game, and a better showing by my artillery could have also tilted the game in my favor. With better shooting on the left my three Tigers should have easily handled five T-34s, opening the way for a blitz on the mortar tubes that lay behind the Soviet tanks. Because the Soviets had no infantry, there would have been little to stop a strike from the left. But, as they say, that’s why the game is played. The Soviets won the day, and it was a good time. I enjoyed being able to substitute most of the vehicles on my force for something else, which allowed me to experience using units that I might not be able to purchase and use in tournament play for some time. The more I play Flames of War the more I like it and I look forward to the next game.
|
Please support the folks that support GrogHeads
|


Copyright ©2012-2019, Grogheads, LLC. All rights reserved in the United States and throughout the world. All other products and copyrights mentioned on Grogheads, LLC are the property of their respective companies, and Grogheads, LLC makes no claim thereto.
GrogDice - Refresh the screen to roll a new set!
Or go here to roll a LOT of dice