Let Your Grog Flag Fly!
Recent Articles
GARPA 17, 4/26/13
SimCity AAR Part 1, 4/25/13
Announcing MayViation, 4/24/13
Second Look at Wargame AirLand Battle, 4/21/13
First Look at Wargame AirLand Battle 4/19/13
AAR of Dark Age Minis Battle, 4/18/13
Video Review of Zulus on the Ramparts, 4/14/13
GARPA 16, 4/12/13
Crusader Kings II AAR Part 16, 4/11/13
Book Review: Ninja: 1000 Years of the Shadow Warrior, 4/10/13
Review of Bioshock INfinite, 4/7/13
Review of XFX PRO650W Core Edition PSU, 4/5/13
Civilization V AAR, Part 13, 4/4/13
Fire with Fire, 3/31/13
GARPA 15, 3/29/13
Civilization V AAR, Part 12, 3/28/13
Wheaton INterview, 3/27/13
March Mayhem Winner, 3/25/13
Warlock Multiplayer AAR, 3/21/13
WWII PTO Alternate Histories, 3/20/13
GARPA 14, 3/15/13
Crusader Kings II AAR, part 15, 3/14/13
Civilization V AAR, part 11, 3/7/13
Prezcon Convention Coverage, 3/2/13
Civilization V AAR, part 10, 3/3/13
Click here for our
FULL Article Index
and
Screenshot features |

A Fight in the Bocage
A Flames of War AAR
Jim Zabek, 19 November 2012
Kicking off our first (of what plan to be "annual") Tanksgiving series of articles, Jim's got us a game of Flames of War, in which he learns the hard way that TANKS ROCK!
click images to enlarge
and some of the get damn big, so watch out
You know the old adage, “Never bring infantry to a tank fight.” Well, this is a lesson I’m about to learn (again) the hard way. Normally I like to play Flames of War with a heavy dose of armor. But in this game we elected to play with infantry-heavy lists and bring in snipers to see how they would work. This is a great idea except that I brought an infantry-only list, and my opponent did not. We had some AT to help offset his advantage, but in the end AT guns are no substitute for good old fashioned tanks.
In this game I chose an army list out of the Grey Wolf supplement. The hard hitting Fallschirmjäger are pricey but they hit hard. This is a friendly game and Mat tells me he’s bringing a platoon of Stuart light tanks to keep me on my toes. With that knowledge and a cap of 1000 points we field the following forces:
Fallschirmjäger HQ , an attached Püppchen AT squad, three 80 mm mortars, and three snipers. To that I add two platoons of two squads of Fallschirmjäger, two Heavy Machine Gun squads, and two PaK 40 anti-tank guns. My total cost comes to 970 points. The American Rifle Company fields a HQ, two rifle platoons, a weapons platoon with two LMGs and three 60 mm mortars, two HMGs, four Stuarts, and four 105 mm howitzers for a total of 960 points.

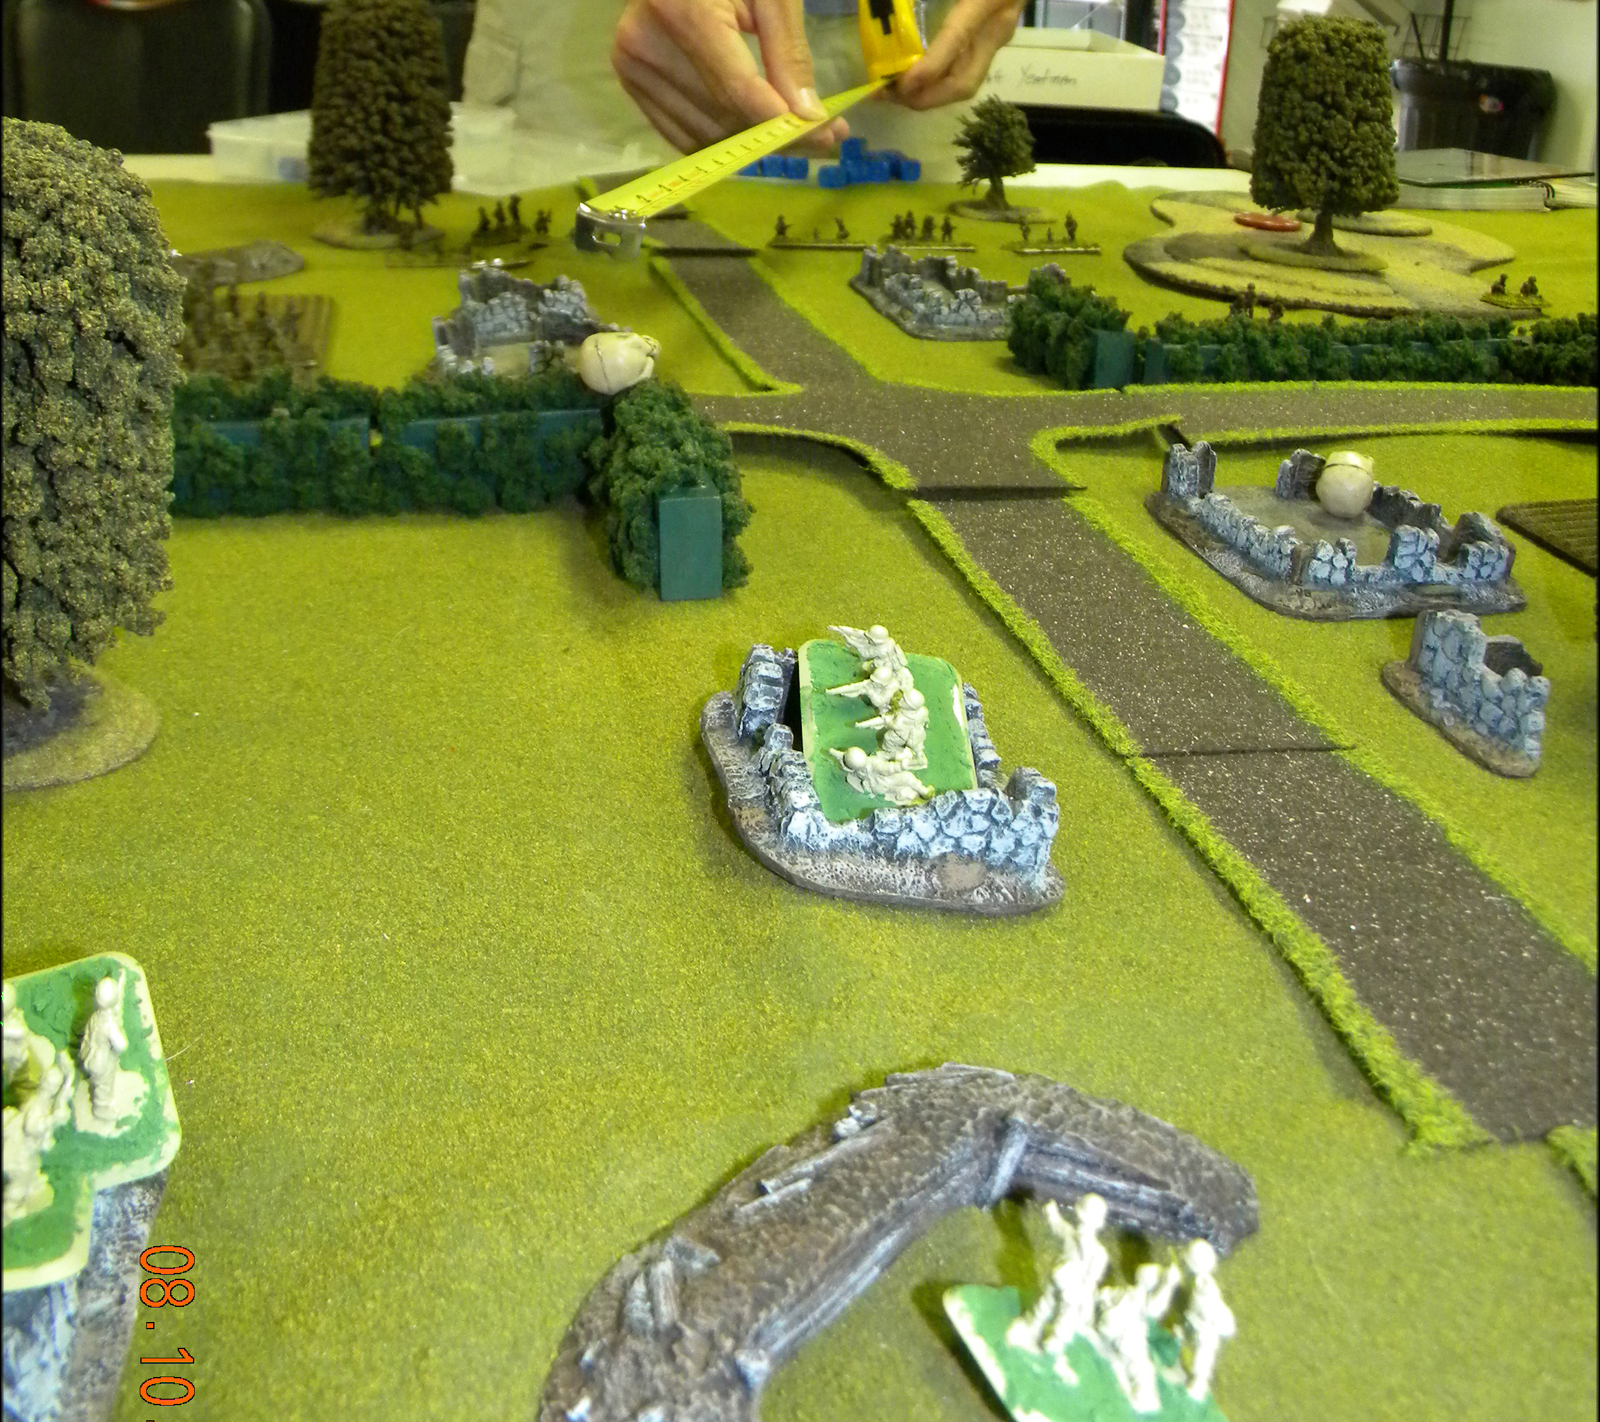
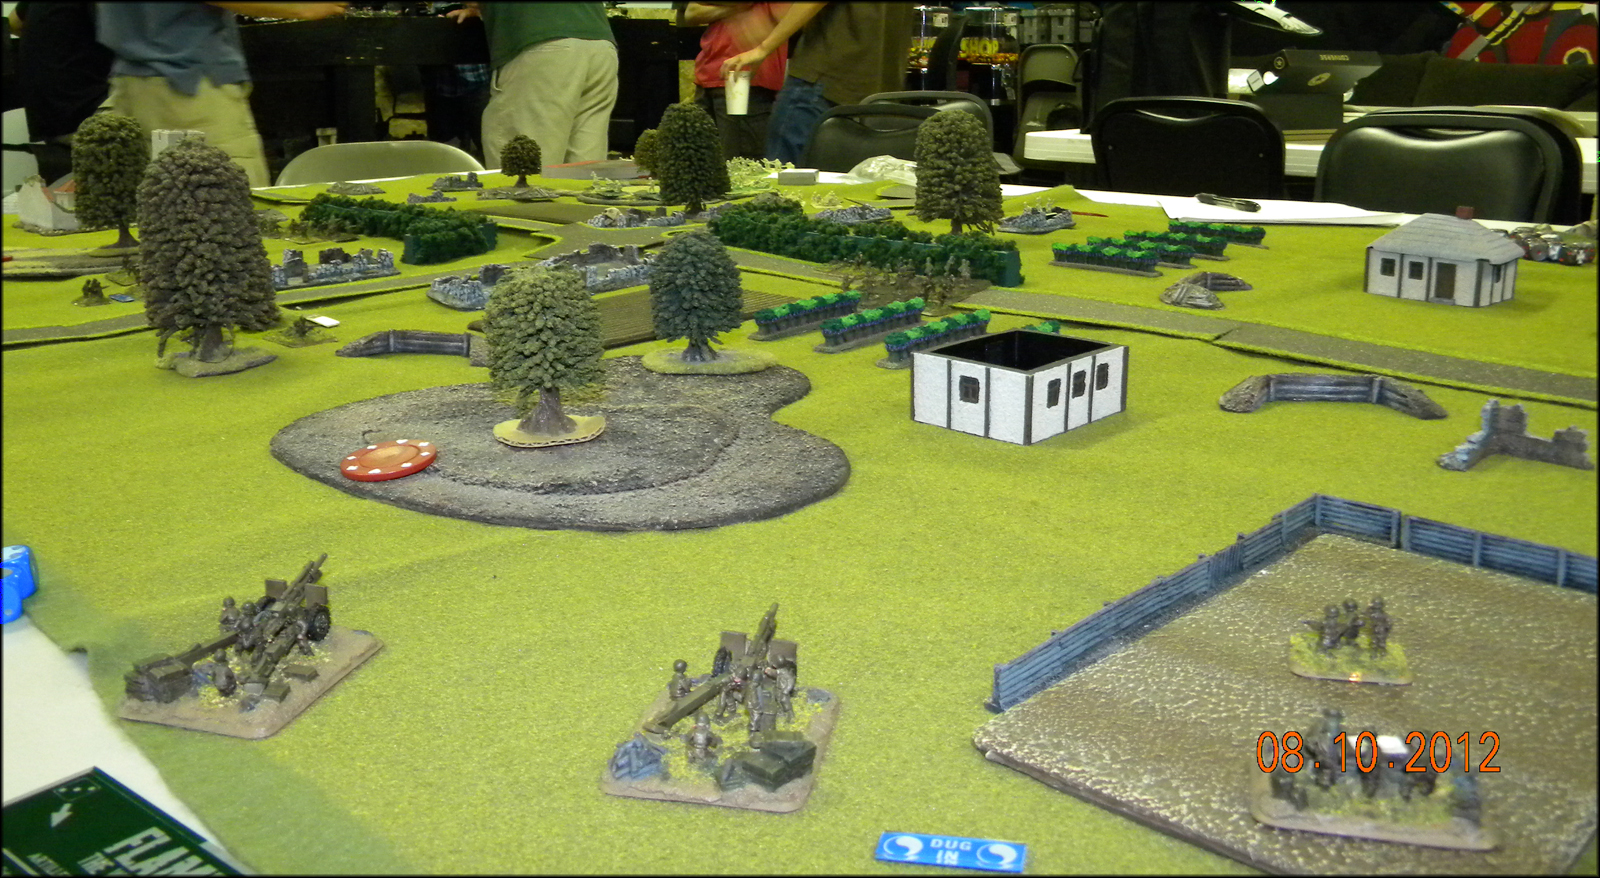
The scene before the action unfolds.
US Turn 1
Rolling for initiative the Americans find themselves on the offensive. As we deploy, I run into a typical problem facing Germans – I have fewer platoons, and therefore have to finish deployment before my opponent. The map is well constructed, but I have to choose which side to place my PaK 40s on. I wait as long as I can but find that I have to place them before the Stuarts are placed. Not a huge deal, but I would have preferred to have deployed them after knowing where the Stuarts were going. I chose the right hand side of the board. Turns out they will come in on the left.
The start of the turn sees the US sniper deploying in the tower of the ruined church on the right flank. The other US sniper moves to the woods on the right. The US artillery spotter moves to the edge of the woods behind the bocage on the right. An infantry platoon moves up to the bocage on the right also. His mortars dig in, but his HMGs do not manage to do so. The rifle platoon on the left flank moves out of the woods and into the field, as they start to carefully close with me. The 105s dig in also. The Stuarts take my 1IC and Püppchen squad under fire to no effect.
German Turn 1
On my Turn 1 my attempt to order my mortars to dig in starts a pattern that will plague me throughout the game. Maybe the earth is especially hard, or maybe my troops would prefer to be on the offensive, but they fail to dig in. I deploy my snipers across the front and start shooting but fail to do anything. I rotate my PaK 40 to face the Stuarts…and discover the Stuarts are *just* out of their range. My HMGs take his sniper under fire but fail to get him. My 1IC and Püppchen enter the farmhouse in front of them. The Püppchen fires on the Stuarts but misses.
US Turn 2
As the rifle platoon moves toward the bocage on the left, the HMG digs in on the center. The sniper in the church tower takes aim at my HMG platoon but fails to hit them. The rifle platoon in the bocage on the right fires at my HMG platoon and wipes out two squads. In the center his mortars conduct direct fire at my infantry platoon in the center and take out two squads. On the left Matt’s rifle platoon moves to the vineyard and fires at the sniper in the bocage, but to no effect. His sniper on the left takes a shot at my sniper but also misses. Firing his 105s they make a lot of noise but fail to range in. His Stuarts, however, have better luck. Firing at the house they succeed in wiping out the 1IC and the Püppchen squad.

German Snipers attempting to hold the middle.
German Turn 2
The first thing I do on my turn is to order my HMG platoon to dig in. They do so. I then order my PaK40 to dig in, but they do not. The infantry in the middle of the table near the PaK40 doesn’t dig in either. The mortar team in my vineyard is ordered to dig in and fails also. My two snipers in range of Matt’s infantry on the right fire and pin the rifle platoon. The sniper on the left pins his other rifle platoon near the bocage on the left. That ends my turn.
US Turn 3
Matt’s first move is to attempt to unpin the infantry that my snipers pinned. However, they fail their morale check and remain pinned. My snipers are doing their job of holding him up. The Stuarts advance on my left but remain wary of the range of my PaK40s and stay out of their reach. On my right his sniper in the church tower fires on my HMG but to no effect. His infantry team in the bocage to the right fires at on one of my snipers but misses him. The platoon on the left fires on the sniper on the left, hitting but fails to damage him. His HMG in the middle fires on my sniper in the middle, scores three hits, but fails to damage him. His mortars try to range in on my 2IC in the middle but fail to hit him. Then his 105s open up on my mortar platoon, pinning it down and killing one team. Their failure to dig in has cost them. The Stuarts are in rage of my mortars sheltering in the vineyard and take them under fire but don’t hit them.

The US light armor is just heavy enough to cause me serious concern.
German Turn 3
The first thing I do is try to rally my mortar team, but fail to do so. Next I order my PaK40 to dig in, and it succeeds. My infantry in the middle fail to dig in. My infantry on the right is concealed in the forest, but I decide it would be prudent to order them to dig in just in case Matt succeeds in pushing through my snipers and HMG platoon. As my HMG team, they take the infantry in the bocage on the right under fire and kill two squads. I’m really liking how the HMG is performing and it’s looking like it’s going to become a staple of any infantry company I field. Because his infantry is slowly encroaching on my snipers I decide to pull one back into my pool. The sniper on the right fires that the infantry in the bocage and manages to kill yet another squad, in addition to the two taken out by my HMG. My third sniper fires, but misses its target, the infantry in the bocage. My mortar fires at his infantry on the left but misses.
US Turn 4

The Stuarts advance on my left, still just outside of the range of my PaK40s.
Matt’s first priority is to attempt to rally the squad in the bocage which just got hammered by my HMG and sniper. It fails its morale check and remains pinned. The platoon on the left, however, rallies successfully. The Stuarts then move up a bit closer on the left into the field. He then tries to bring both of his snipers back into his pool but fails on both attempts. The US rifle platoon on the left moves up to the bocage. It fires on my sniper on the left and takes him out. Then the 105s open up on my mortars and kill another team. Then he trains his mortars on my infantry platoon in the middle but it misses. Then his rifle platoon fires on my remaining mortar team, succeeding with one hit but fails to damage it. The rifle platoon on the right fires on my HMG and misses. Then his HMG opens up at one of the squads in my Fallschirmjäger platoon. He gets three hits but as that squad is the only one visible it takes them all and dies. Then his Stuarts fire on my mortar team but miss.
US mortars attempt to find the range of my infantry platoon.
German Turn 4
My mortar team makes its morale check and rallies. I order it to dig in, but once again it fails. I redeploy my sniper to the middle but a bit farther back from his troops so as not to be in immediate danger of being overrun. My HMG platoon fires on the rifle platoon in the bocage on the right and kills another squad. One more squad and I’ll force him to take a morale check. That could turn the game. I’m getting more optimistic about my chances of winning this game. On the left I order my two snipers to fire on the rifle platoon on that side of the board, but they both miss. My Fallschirmjäger platoon in the middle of the board fires at the rifle platoon in the bocage on the left and takes out one squad. My PaK40s then open up on the rifle platoon on the left, too, and take out another squad. With that my turn is over and I pass the initiative back to Matt.
US Turn 5
On the right Matt manages to rally his rifle platoon and it becomes unpinned. He orders it to move back from the bocage since my HMG and snipers are close to forcing him to take a morale check. He decides to pull both of his snipers back into the pool and does so successfully. He then orders his mortar to shell my platoon in the middle of the map. They immediately find its range and start dropping rounds on them, managing to pin them but do no damage. His HMG fires at my middle sniper but to no effect. His rifle platoon on the left fires at my mortar team but also fails to do any damage. Then his 105s and succeed in getting a Time on Target on my infantry in the middle, taking out one squad. With that the platoon breaks and scatters. Their constant refusal to dig in now costs them – and me, and I’m sensing my time with this game is getting short. Matt then orders his Stuarts to fire on my mortars but they miss. This has been a good round for the US. What I do next may determine who wins the game.

My Pak40s itching for those Stuarts to come into range…
German Turn 5
Since Matt has pulled his rifle platoon back from the bocage I decide to relocate my HMG platoon to a more central location by moving them left into the woods. I still have an entirely intact platoon in the woods on the right and the HMG may be able to bring some extra weight to counter the loss of my platoon in the middle. Yes, they were dug in and in bulletproof cover, but their firepower has proven its value. This is the first game I’ve used an HMG platoon and I’m glad I bought the set. Now let’s see if they can pull a rabbit out of their hat and beat on the pressure I’m feeling on the left and middle. It’s a gamble, but I don’t think I have too many other options. In the center I order what’s left of my mortar team into cover. The two snipers take the rifle platoon on the left under fire but to no effect. My PaK40s aren’t great against infantry but they’re better than nothing. I order them to also fire at the rifle platoon in the middle and they manage to take out a squad. My mortar conducts direct fire on the rifle platoon in the bocage and misses. My turn is over.
US Turn 6
Matt rolls and fails to get his snipers out of his pool. The then starts to make preparations to seize the left objective. He pulls the platoon in the middle off the bocage except for the MMG, which he uses for covering fire. The platoon on the right bunches up and prepares to move next turn. The Stuarts move up and prepare for a nasty fight with my two PaK40s. He orders his mortar to fire on my mortar but does no damage. Then he orders his HMG to fire on one of my snipers. It gets four hits and I start sweating. I fail one save, but he fails his firepower check and the sniper lives. Matt doesn’t like to get squirrely with the rules. Some gamers will use their artillery to smoke out tough German units, but that’s not Matt’s style. However, he is now faced with a tough situation – my PaK40s are a tough nut to crack for his light Stuart tanks. He mentions he’s thinking about smoking them and I readily agree – it’s his best option. Reluctantly he drops smoke on my Pak40s and their visibility is severely restricted. They now cannot see the left objective well enough to fire on anything attempting to take it, rendering them more or less useless. If I attempt to move them, they will lose their defensive bonus of being dug in. Leaving them where they are they’re not much good.
Meanwhile his Stuarts fire at my mortar team, and succeed in killing it. At this point it’s clear that my PaK40s cannot hold the left flank and I concede the game.
The weight of 105s and Stuarts is too much for my Fallschirmjägers and they have to fall back.
Conclusions
Even so I probably could have moved my infantry platoon on the right over in an earlier turn and kept my HMG where it was. That might have made for a more interesting game. The one thing I lacked that would have been nice is smoke. With smoke I could have hidden the redeployment of my PaK40s to the left to get closer to the Stuarts and better defend the left-hand objective. Had I recognized that smoke would be used to take them out of defending the left I might have been able to put up a better defense there. The only other thing that would have improved my performance would have been some solid armor. No tanks, no Tanksgiving for me.
Regardless of how I might have played better, I had a great time and am looking forward to more Flames of War in the near future.
Discuss this article in our forums >>
|
Please support the folks that support GrogHeads
|